Focaccine
These bite-sized focaccine are a must-try! They are fluffy, flavorful, and a staple in Italian bakeries. Let me show you how to make them at home with simple ingredients and delicious toppings.

At home, I love making these for antipasto (appetizer) when friends come over, then serve along some cheese. And if you’re looking for something more filling, you can even slice them open and stuff them with mortadella, prosciutto, or a little stracchino cheese.
Focaccine are basically little focaccia. It has that same soft, fluffy texture but in a bigger, tear-apart version.
The best part? Making them at home is easier than you think. They don’t require much effort, just a little patience while the dough rises.
And when they bake, your whole kitchen fills with that incredible warm, yeasty, olive oil-scented goodness. Trust me, once you taste one fresh from the oven, you’ll never look at store-bought snacks the same way again!

How To Make Focaccine
First, grab your stand mixer and toss in all the dough ingredients—flour, yeast, water, olive oil, sugar, and salt. Attach the dough hook, let the machine do its thing, and watch as everything comes together into a soft, smooth dough.
If you don’t have a mixer, no worries! Just knead it by hand until it’s nice and elastic, it’s a bit of a workout, but hey, that’s part of the fun.
Once the dough is ready, shape it into a ball and pop it into a lightly oiled bowl. Give it a little turn so it gets coated in oil (this keeps it from drying out), then cover it up and let it rest.
It needs about two hours to rise. Perfect time to clean up, have a coffee, or wonder why yeast dough always feels like it takes forever.

When the dough has puffed up beautifully, flour your work surface and gently press it down with your hands to release the air.
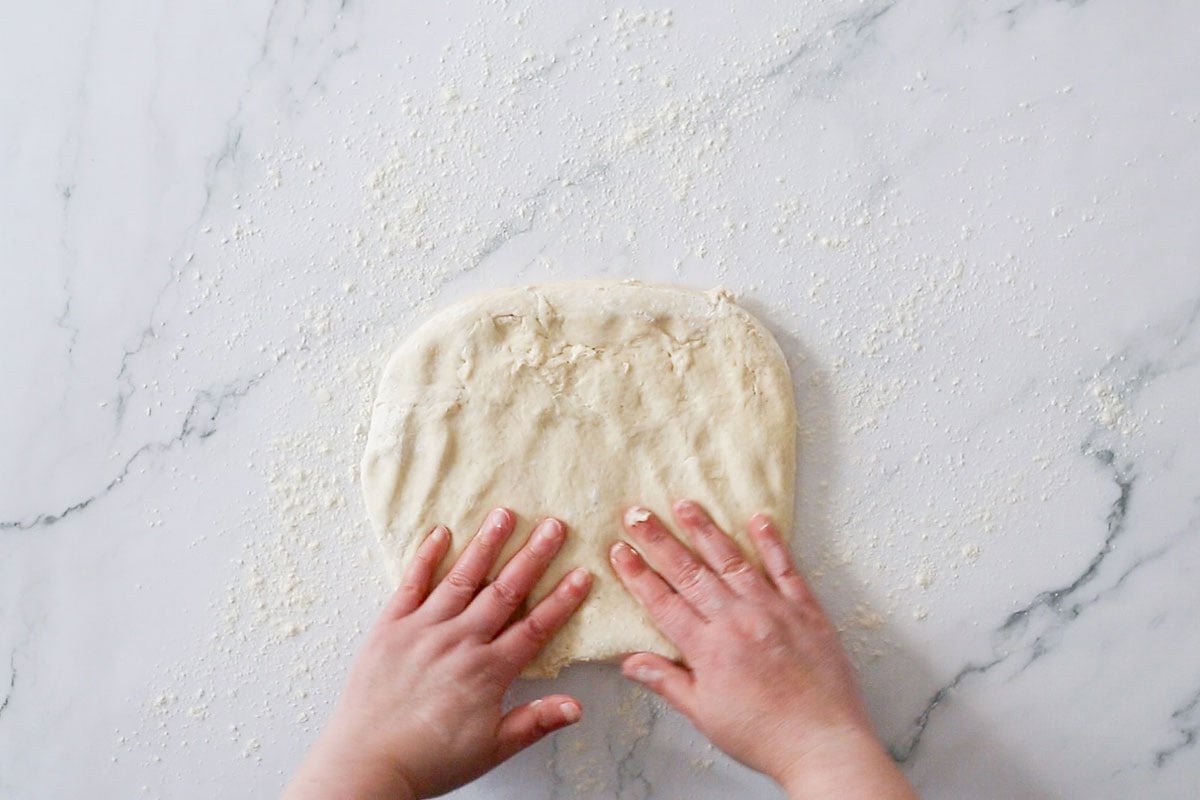
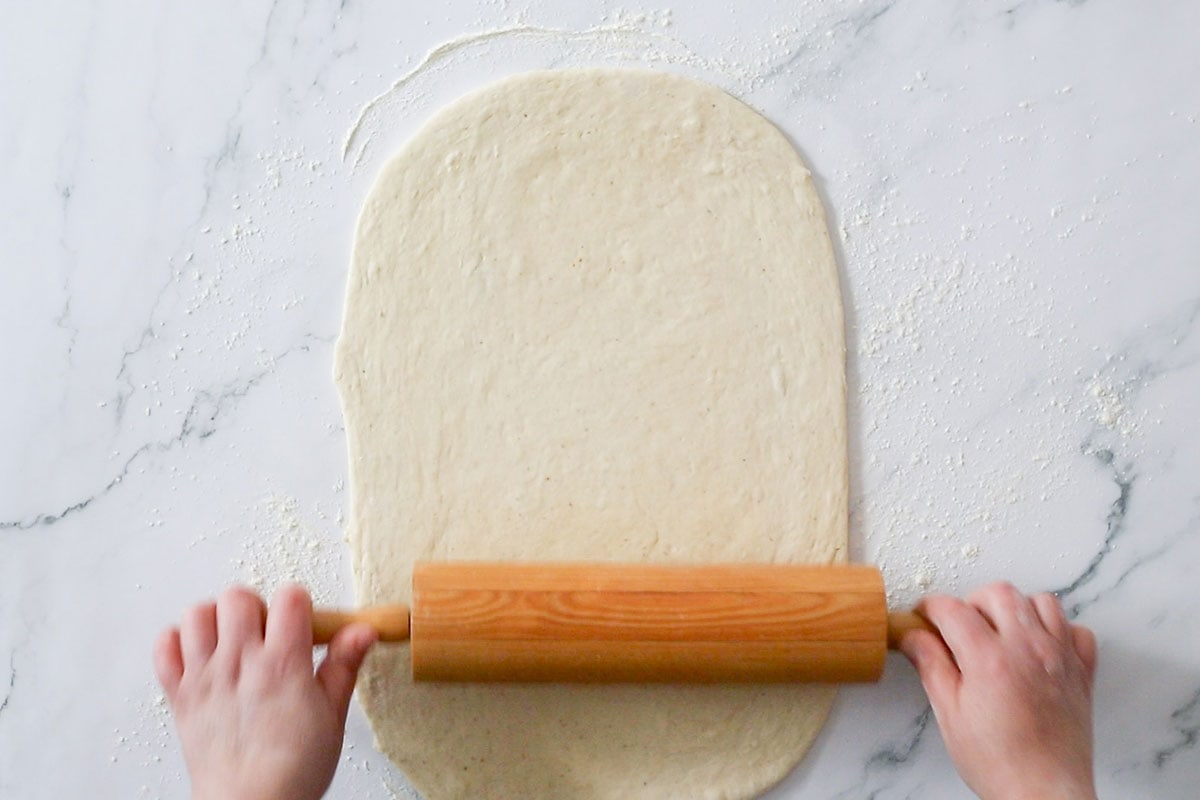
Then, grab a rolling pin and roll it out to about ¼-inch thick. Don’t press too much or the dough will become dense, we still need it to be a bit puffy.
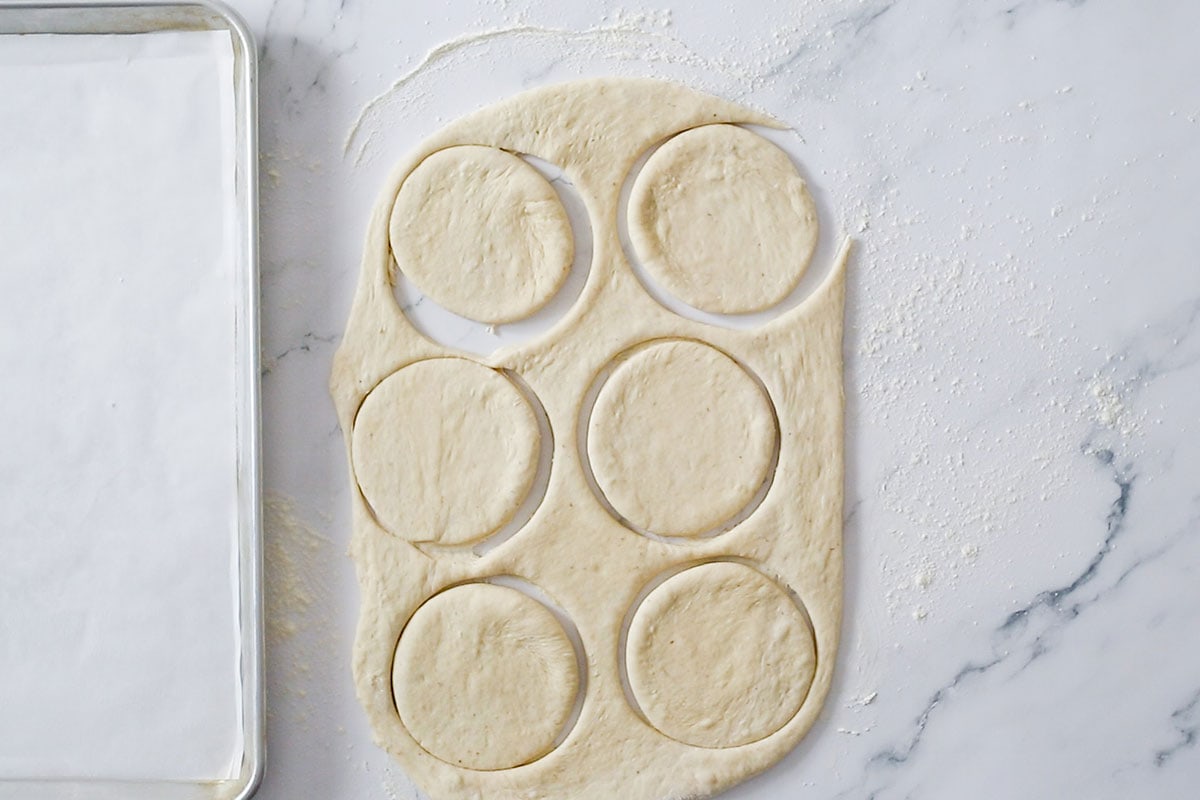
Now, use a round cutter (a glass works too) to cut out 3-inch circles and arrange them on a baking sheet lined with parchment paper.
Don’t toss the scraps, smoosh them back together, roll them out again, and cut more. We’re not wasting dough here!
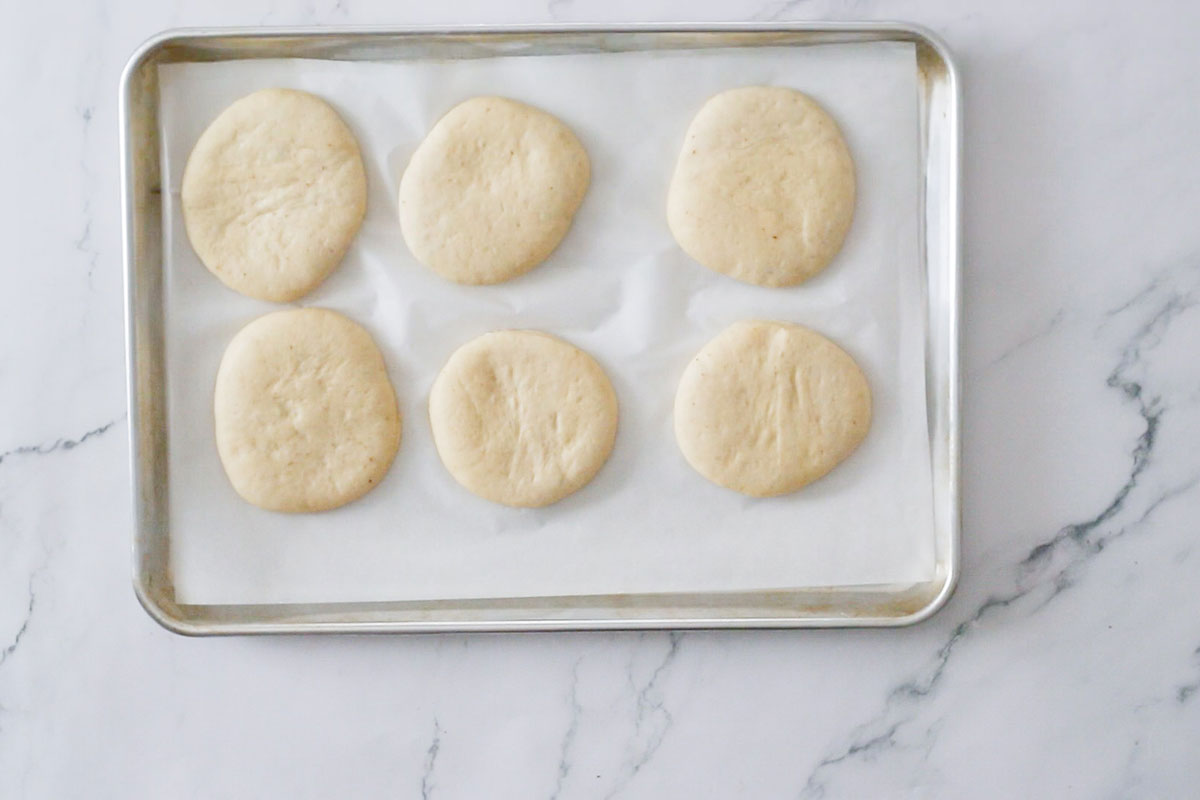
Cover your little dough rounds loosely with plastic wrap and let them rest for another 30 minutes. This will make them super puffy and soft, so don’t rush this step.
Meanwhile, make a quick brine by mixing olive oil, water, and salt. This will give the little focaccine that perfect golden, slightly crispy top.
Now, let’s dress these up! Once the dough rounds are nice and puffy, brush them with the brine, then top some with cherry tomato halves, others with green olives, and sprinkle a few with oregano.
And here’s a fun trick. Oil your fingers a little, then gently press into the dough to create those signature dimples. It’s oddly satisfying.

Pop them into a preheated 360°F (180°C) oven and bake for 20-25 minutes, or until they’re beautifully golden and smell like heaven.
When they’re done, transfer them to a cooling rack (if you can resist eating one right away).

Enjoy them warm or save some for later—though, let’s be honest, they probably won’t last that long!
My Best Tips
- Use good olive oil – Since olive oil is a key ingredient, go for a high-quality extra virgin one. It makes a difference in flavor!
- Hand-kneading works too – No stand mixer? No problem! Knead by hand for about 10 minutes until the dough is smooth and elastic.
- Let the dough rise properly – The longer rise time helps develop flavor and gives the focaccine that soft, airy texture. Be patient!
- Get creative with toppings – Try rosemary, caramelized onions, or even a sprinkle of flaky salt for different flavors.
- Make them extra fluffy – If you like a softer bite, let the shaped dough circles rise a little longer before baking.

Store And Reheat
Focaccine are best enjoyed fresh, but if you’re making a big batch, it’s always good to know how to store them. Whether you’re prepping ahead for a party, packing some for a picnic, or just want to have a few on hand for a quick snack, they keep well with the right storage.
At room temperature, they stay soft and delicious for about two days. Just keep them in an airtight container or wrapped in a clean kitchen towel to prevent them from drying out.
If you need to store them longer, the fridge is an option, though it does firm them up a little. A quick warm-up in the oven at 300°F (150°C) for a few minutes will bring back that freshly baked feel.
For longer storage, freezing works great. Once they’re completely cool, pop them into a freezer bag and store them for up to a month.
When you’re ready to enjoy them, just let them thaw at room temperature and, if you like, give them a quick reheat in the oven.
That said, in Italy, focaccine are often eaten at room temperature, especially as an antipasto. So if you’re taking them to a gathering or just snacking at home, you might not even need to warm them up!
More Italian Recipes
Print The Recipe

Focaccine
Ingredients
- 2 ⅔ cup all-purpose flour
- 2 teaspoons instant yeast
- 1 cup lukewarm water
- 4 Tablespoons extra virgin olive oil
- 1 ½ teaspoon sugar
- 1 teaspoon table salt
For toppings
- 3 cherry tomatoes (halved)
- 6 green olives (pitted)
- oregano (as needed)
- 1 Tablespoon extra virgin olive oil
- ½ teaspoon salt
Instructions
- In a stand mixer with a dough hook, combine all dough ingredients. Knead until smooth and soft.
- Shape into a ball, place in a lightly oiled bowl, cover, and let rise for 2 hours or until doubled in size.
- Transfer the dough to a lightly floured surface. Gently press down on the dough with your hands to deflate it, then use a rolling pin to roll it out to ¼-inch thick.
- Cut out 3-inch circles and place them on a baking sheet. Gather scraps and repeat to make more.
- Cover loosely with plastic wrap and let rest for 30 minutes.
- Mix 1 Tbsp olive oil, 2 Tbsp water, and ½ tsp salt to make a brine. Set aside.
- Once the dough is puffy, brush with the brine, then arrange the cherry tomatoes, olives, and oregano on top.
- Lightly oil your fingers and press dimples into the dough.
- Preheat the oven to 360°F (180°C) and bake for 20-25 minutes or until golden brown.
- Transfer to a cooling rack. Enjoy warm or store for later.
Tips & Notes
- Use high-quality extra virgin olive oil for the best flavor.
- If kneading by hand, work the dough for about 10 minutes until smooth and elastic.
- Let the dough rise fully—this makes the focaccine soft and airy.
- Experiment with toppings! Try rosemary, flaky salt, or caramelized onions.
- Storage: Keep at room temperature for up to 2 days in an airtight container. For longer storage, refrigerate for up to 5 days or freeze for up to a month. Reheat in the oven at 300°F (150°C) for a few minutes if needed.